

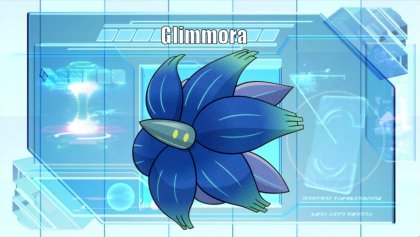
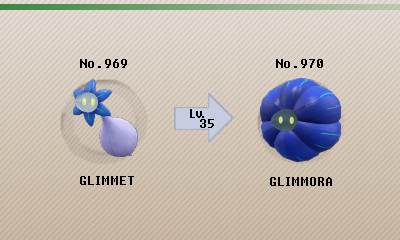
Glimmora, the Ore Pokémon. When this Pokémon detects danger, it will open up its crystalline petals and fire beams from its conical body. Glimmora's petals are made of crystallized poison energy. It has recently become evident that these petals resemble Tera Jewels.
Overview
Glimmora, the ace of Champion Geeta, has unsurprisingly made a large splash onto the competitive scene, though not for the reason's Geeta used hers. Glimmora's claim to fame is the effortless setting of Toxic Spikes its signature ability Toxic Debris enables. Being able to setup Toxic Spikes without wasting a move or moveslot is incredibly powerful, guaranteeing chip damage throughout the match and making offensive teams that much more oppressive. Glimmora is far from a passive hazard setter; Base 130 Special Attack with fantastic Rock STAB and good coverage means Glimmora is a powerhouse that your opponent cannot ignore, placing pressure on them to attack Glimmora and trigger Toxic Debris lest it start blasting the team to pieces. If that wasn't enough, Glimmora offers utility in hazard control as well, able to remove them with Mortal Spin, maintaining its hazards while keeping your field clean.
This crystal has very little outside of that, however. Glimmora's average defenses and crippling quadruple weakness to Ground leave it lacking in durability. This is especially unfortunate for a hazard setter, as Glimmora struggles to re-establish Toxic Spikes after they have been cleared. Base 86 Speed is awkward too, falling short of many offensive threats who can pressure Glimmora out. Glimmora's ability setting Toxic Spikes also leads to several awkward moments, being the easiest to clear away with a grounded Poison type and making it difficult to use other statuses like Burn, Paralysis and Sleep. Glimmora's effortless hazard setting is still peerless among its contemporaries and as such can always find a home with those that need its services.
Positives
Toxic Debris is an amazing ability, allowing Glimmora to attack while setting up hazards generating a lot of offensive pressure.
Glimmora's hazard game is incredibly good, able to set Spikes, and Stealth Rock alongside providing hazard control with Mortal Spin
Base 130 Special Attack is incredibly potent, coupled with great offensive Rock STAB, complimentary Poison, and great coverage, leaving few safe switch ins to Glimmora's offense.
Negatives
83/90/81 defenses, common Water and Ground weaknesses prevent Glimmora from taking many attacks.
Toxic Debris requiring Glimmora to be hit on top of durability issues makes reestablishing Toxic Spikes difficult.
Base 86 Speed falls short of many offensive threats, making it easy to revenge KO Glimmora.
Movesets
Holy Hazardous Hollow
-Stealth Rock
-Spikes
-Mortal Spin
-Power Gem
Ability: Toxic Debris
Item: Focus Sash
EVs and Nature:
4 HP / 252 SAtk / 252 Spe
Timid Nature
This Glimmora set acts as a lead, throwing up entry hazards for its teammates to capitalize on. Toxic Debris is amazing, its triggering allows Glimmora to setup multiple hazards at once. Stealth Rock is preferred for initial setup, given that it hits everything that isn't immune to hazards, though Spikes does wonders against grounded teams for consistency especially if you can get all three layers. Mortal Spin enables Glimmora to counter opposing Hazard setup, as well as Poison the initial Pokémon that won't be hit by the hazards Glimmora sets up. Power Gem prevents Glimmora from being completely passive, enabling it to threaten opponents and incentivize them into attacking Glimmora to not be KO'd in turn.
Tera Types:
This Glimmora set really does not like Terastalizing, leaving that for a sweeping teammate. Its role is to set up hazards and be knocked out, so Terastalizing matters little. If one wants to Terastalize, Tera Flying is great for getting an extra turn against Ground type attackers, while Tera Ghost can prevent Extreme Speed Dragonite from picking Glimmora off after the Focus Sash is broken, guaranteeing more setup.
EVs and Items:
Max Speed is required; the more targets Glimmora outspeeds, the more it can setup multiple layers of hazards against. Max Special Attack compliments the stat line; you want Glimmora to be KO'd after setting up, so investing in bulk is counter-intuitive and the extra Special Attack is fantastic in pressuring opponents into attacking Glimmora to trigger Toxic Debris. Focus Sash helps all but guarantee two layers of Toxic Spikes by guaranteeing Glimmora to survive one hit. As a lead, Glimmora does not have to worry about opposing hazards breaking the Sash as there will be no hazards up when Glimmora comes out. Mental Herb is another valid option to blank a use of Taunt so that Glimmora isn't forced out before setting up hazards. Red Card is a niche tech option, but can force an opponent's opening Pokémon out, ensuring not even the initial Pokémon is safe from Glimmora's hazards.
Partners:
Gholdengo is a fantastic partner for Glimmora, helping ensure its hazards stick by blocking all forms of removal with a combination of Ghost Steel typing and Good as Gold. Gholdengo in turn enjoys the hazards Glimmora sets, greatly fascilitating KOs with all the passive damage.
Other Options:
Venoshock is a good option, threatening Hatterene who can otherwise stop most Hazard setup but Poison's poor coverage can make Venoshock less reliable than Power Gem. Sludge Wave is also worth consideration for similar reasons.
Earth Power offers fantastic Ground coverage that threatens Steel types immune to Mortal Spin and Toxic Spikes.
Memento is a great option if Glimmora is still up after setting up hazards, giving a safe pivot to a teammate that can take advantage of the weakened opponent to set up.
Gem Polishing Scarf
-Power Gem
-Sludge Wave
-Earth Power
-Energy Ball
Ability: Toxic Debris
Item: Choice Scarf
EVs and Nature:
4 HP / 252 SAtk / 252 Spe
Timid Nature
Scarf Glimmora is an effective revenge killer, using its high Special Attack and great coverage to grab KOs with Choice Scarf pathing up Glimmora's middling Speed, while still being a reliable Toxic Spikes setter. Power Gem is Glimmora's best Rock STAB, and gets by with the wide coverage Rock boasts, hitting many Fire and Flying types like Skeledirge, Ceruledge, Iron Moth, Moltres, and Zapdos. Sludge Wave is Glimmora's other STAB, and as poor as Poison is offensively, it still hits very important targets including Rillaboom, most of the Ogerpon forms, Clefable, Enamrous, Hatterene and Iron Valiant. Earth Power provides invaluable coverage, hitting the Steel types that resist both STABs as well as being incredibly synergistic with Glimmora's Rock STAB. Energy Ball is similarly important, hitting the Ground types that resist both STABs as well as Water types that threaten Glimmora in turn.
Tera Types:
Tera Grass is incredible for Glimmora, both offensively by bolstering Energy Ball and defensively by giving Glimmora resistances to Water and Ground attacks. The many weaknesses of Grass types are less of a concern for Glimmora, given its natural typing resists all but Ice and threatens all but Poison, enabling effective mind games. Tera Ground is a more offensive option, buffing fantastic Ground coverage and can be the necessary boost to push through bulky Steel types.
EVs and Items:
Max Speed and Special Attack are again recommended, to outspeed as many targets as possible with Choice Scarf and to maximize effectiveness as a revenge killer. Timid is recommended as the nature, as a Speed neutral nature leaves Glimmora outsped by max Speed Dragapult, max Speed Zamazenta, and Scarf H-Samurott. That being said, Modest does provide a valuable power boost in reaching KOs, and can be worth considering if not concerned about the aforementioned targets. Choice Scarf is the namesake of the set and thus mandatory. Assault Vest is another consideration, putting your opponent in a brutal catch-22; either attack Glimmora on its now bulkier Special side to avoid activating Toxic Debris and be forced to eat Glimmora's attacks or attack Glimmora on its physically frailer side to put it down quicker, but now must deal with Toxic Spikes for the rest of the match.
Partners:
Grass types make for excellent partners for Glimmora, absorbing lethal Water and Ground attacks while threatening opposing Ground types with STAB in turn. In turn, Grass types love Glimmora for being able to absorb and threaten Flying, Fire, Poison and Bug attacks. Wellspring Ogerpon is a standout representative, being immune to Water attacks, and having Water Ivy Cudgel to deal with Ground types that aren't weak to Grass on top of being offensive enough to benefit from Toxic Debris.
Garganacl is an odd but effective partner to Glimmora despite sharing the unfortunate Rock typing. Garganacl's bulk and access to Salt Cure + Protect are great for stalling out for Toxic Spikes damage, helping pile on passive damage quickly. Garganacl likes Glimmora threatening most forms of Ogerpon and Rillaboom with Poison STAB.
Other Options:
Mortal Spin is a niche option, but sometimes you really need hazards to be removed.
Stealth Rock is good if you think your opponent has an effective pivot to Glimmora, enabling you to set up even if your opponent can blank your setup attempt.
Dazzling Gleam offers stellar coverage against many Dragon, Dark and Fighting Pokémon and can be instrumental in getting KOs on them, especially Garchomp, while still covering Ting-Lu and Great Tusk.
Doubles and VGC Options
While hazard setting is far weaker in a Doubles as opposed to singles due to the far less switching that goes on, Glimmora's Toxic Debris bucks this trend, thanks to its passive setup not contingent on one wasting turns. Glimmora's Toxic Debris being so efficacious turns the scarcity of hazard in Doubles into a strength, meaning very few teams will have answers to Toxic Spikes and putting at least the back half of the opposing team on a strict timer and outright punishing the use of Protect. Glimmora's high Special Attack and Poison spreading Mortal Spin ensures opponents can't afford to ignore Glimmora. Glimmora remains somewhat niche; as helpful as Poison is, the fast paced Doubles format makes it difficult to get the most mileage out of it.
Handle With Care
-Power Gem
-Sludge Bomb
-Earht Power
-Spikey Shield
Ability: Toxic Debris
Item: Focus Sash
Tera Type: Flying/Ground/Grass
EVs and Nature:
4 HP / 252 SAtk / 252 Spe
Timid Nature
Glimmora's goal in doubles is damage and it handles that with aplomb. Power Gem and Sludge Bomb are great STABs to have, the former threatening Tornadus, Hisuian Arcanine, Chien-Pao, Iron Bundle and Alolan Ninetails and many Tera Fire Pokémon, while Sludge Bomb is a nightmare for Flutter Mane and most of Ogerpon's forms. Earth Power provides fantastic complimentary coverage with Power Gem, threatening Steel and Tera Steel types that resist both STABs. Spikey Shield rounds out the set, as Protect on top of the normal utility in Doubles is especially important for Glimmora for stalling out for Poison damage and the extra chip damage is a nice bonus.
Focus Sash for item; much like in Singles, you want Glimmora to live the two hits for Toxic Spikes and hitting Glimmora with Fake Out is the last thing your opponents want to do given Toxic Debris. Max Special Attack and Speed to make Glimmora as threatening as possible on the offensive front so your opponent can't ignore it. Glimmora isn't that reliant on Terastalization; most of its utility comes from its ability. That being said, Tera Ground is recommended for handling Assault Vest Iron Hands and Hisuian Goodra, two incredibly specially bulky Pokémon that Glimmora can struggle to threaten. Otherwise, Tera Grass is a good standby for not being destroyed by Ground and Water attacks.
Other Options & Partners:
Dondozo and Tatsugiri love the Poison Glimmora spreads, and Commander Dondozo's immense bulk and being the only target on the field makes it uniquely adept at stalling out turns for Poison in Doubles. Commander Dondozo likes the passive damage Toxic Spikes provides, making it more difficult for opponents to play around it.
Flutter Mane is another potent abuser of the Toxic Spikes Glimmora sets, enabling it to substitute Shadow Ball for Hex, giving it a powerful Ghost STAB that isn't blocked by Bulletproof.
Screen setters like Grimmsnarl and Alolan Ninetails synergize well with Glimmora as well, enabling your team to better stall out for Poison damage.
Mortal Spin is not here for hazard clearing, being fantastic for spreading Poison, given its 100% Poison rate and ability to hit both opponents
Venoshock is worth considering given Glimmora is excellent at spreading Poison, so why not make the most of it?
Countering Glimmora
Since Glimmora's role in any battle is to set Toxic Spikes via Toxic Debris, circumventing the ability is your top priority. Since Toxic Debris only triggers on physical attacks, special attackers are highly recommended to answer Glimmora, regardless of set. Greninja, Manaphy, Walking Wake, and to a lesser extent, Specs Iron Valiant and Specs Dragapult all can perform this role with aplomb, naturally outspeeding and able to OHKO with their STABs/Psyshock, though Greninja and Walking Wake will need to have Choice Specs to handle Assault Vest Glimmora. Greninja deserves extra mention for being able to run Taunt, stopping lead sets from setting up multiple hazards.
Glimmora isn't just hazards; its potent Special Attack must be respected as well. Steel types excel if Glimmora isn't running Earth Power, resisting both STABs and all other coverage while completely blanking Mortal Spin. Heatran stands out for not triggering Toxic Debris, though Power Gem is likely to 2HKO offensive Heatran after 2 layers of Spikes. Corviknight can work, even with Earth Power, and clearing Glimmora's setup with Defog but needs Iron Head to threaten Glimmora, as Power Gem will outpace unboosted Body Press for a 3HKO.
Ground types are another good answer to Glimmora, exploiting its horrible Ground weakness and resisting both STABs. Clodsire is by far the best answer, clearing any Toxic Spikes naturally and being 4HKOd by Earth Power while threatening an OHKO back with Earthquake. Garchomp also does well along with being one of the few Ground types that don't fear Energy Ball, though must be wary of Dazzling Gleam. Other Ground types like Ting-Lu, Great Tusk work well, though both dislike both Energy Ball and Dazzling Gleam, though Ting-Lu has the sheer bulk to absorb non Tera Energy Ball and Dazzling Gleam.
Other sponges like Blissey, Assault Vest Galarian Slowking and Assault Vest Hisuian Goodra can absorb Glimmora's Special Attacks with ease, though Blissey lacks the power to stop the lead set from setting up.
Locations in Games
Red/Blue/Yellow:
Not in game
Gold/Silver/Crystal:
Not in game
Ruby/Sapphire/Emerald:
Not in game
FireRed/LeafGreen:
Not in game
Colosseum/XD:
Not in game
Diamond/Pearl/Platinum:
Not in game
HeartGold/SoulSilver:
Not in game
Black/White:
Not in game
Black 2/White 2:
Not in game
X/Y:
Not in game
Omega Ruby/Alpha Sapphire:
Not in game
Sun/Moon:
Not in game
Ultra Sun/Ultra Moon:
Not in game
Let's Go, Pikachu!/Let's Go, Eevee!:
Not in game
Sword/Shield:
Not in game
Brilliant Diamond/Shining Pearl:
Not in game
Legends: Arceus:
Not in game
Scarlet/Violet:
Area Zero, Crystal Pool, Oni Mountain
Tera Raid Battles: 5 Star Raid Battles, 6 Star Raid Battles
Anime Appearences
|
Glimmora has yet to make an appearance in the anime
|
|