

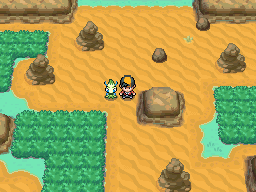
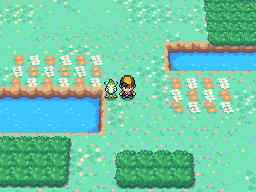
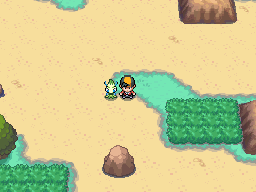
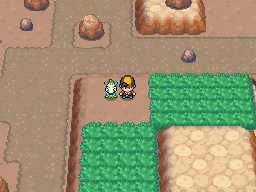
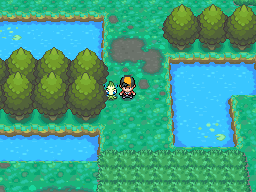
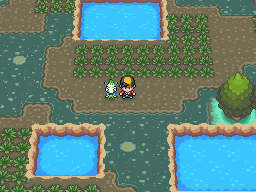
The Safari Zone In the original games, Gold & Silver, when the player got to Fuchsia City, they would discover that the Safari Zone Warden has moved and so the Safari Zone there has moved. In Heart Gold & Soul Silver, we have found where the Safari Zone has moved to , it is now in the new area found west of Cianwood. The Safari Zone works in a similar manner to the previous Safari Zones with you being given 30 Safari Balls and sent into the Safari Zone with only a limited amount of steps. There are six areas in the Safari Zone and they all hold different kinds of Pokťmon so you need to explore if you wish to get them all. However, the Johto Safari Zone has a distinct difference. |
|
||||||||||||||||||||||||||||||||||||||||
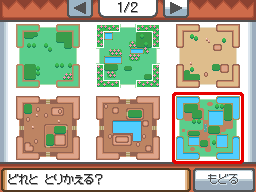
Customisation This new Safari Zone allows you to customise the areas. The customisation allows you to move where all six of the areas of the Safari Zone are. This is useful so you don't have to walk and waste a load of steps should you wish to find a Pokťmon that is only in the Desert area. All you do is slide the areas around using the touch screen. All the areas have exits at the same place so there are no combination that you cannot do. However, to activate the customisation, you first have to do a special task and capture a Geodude for Baoba, the Safari Zone Warden. Show him the Geodude and he will say he'll call you when the customisation is ready, which usually will be in the next day |
|
||||||||||||||||||||||||||||||||||||||||
Personal Customisation After you have done the Warden's second task of bringing him a Sandshrew, he will allow you to start bringing Objects into the Safari Zone. These Objects can be placed anywhere in the Safari Zone just by pressing A when you're playing through the Safari Zone However, these Objects are not superficial and just for aesthetics, these items have the ability of drawing out certain Pokťmon in each area if you place them right. You can place up to 30 items in each of the six Safari Zone areas so use them wisely to get the desired outcome for the Pokťmon you wish. You can then see if the items have lured any Pokťmon in the tile customisation computer. These Pokťmon are typically of higher levels than the normal Pokťmon. As time goes on, Baoba will continue to call you to provide you with more items. If you leave the areas open for set amount of days, the Objects you place in each area level up so they count as more. Once they're levelled up, you can switch without worry. As the areas level up, the amount of Objects that you require for the Pokťmon decreases. For example, Lairon in the Cliff area requires 24 Peak Objects, but after 30 days, it only needs 12 Objects, having each block count as 2 Objects. The table below shows how this works.
|
|
Safari Zone Block Items
Below is a list of all the Safari Zone Block Items and what they manipulate.
| Picture | Name | Size | Placed on | Preferred Placement |
 |
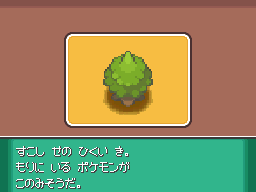
Shrubbery | 1x1 | Land | Plains |
 |
Red Flower | 1x1 | Land | Plains |
 |
White Flower | 1x1 | Land | Plains |
 |
Tree | 2x2 | Land | Forests |
 |
Stump | 2x2 | Land | Forests |
 |
Branches | 2x2 | Land | Forests |
 |
Small Rock | 1x1 | Land | Peak |
 |
Big Rock | 2x2 | Land | Peak |
 |
Mossy Rock | 2x2 | Land | Peak |
 |
Puddle | 2x2 | Land | Water |
 |
Fountain | 2x2 | Water | Water |
 |
Water Hole | 2x2 | Land | Water |
 |
Bench | 2x1 | Land | Other |
 |
Short Fence1 | 1x1 | Land | Other |
 |
Short Fence2 | 1x1 | Land | Other |
 |
Long Fence1 | 2x1 | Land | Other |
 |
Long Fence2 | 1x2 | Land | Other |
 |
Signboard | 1x1 | Land | Other |
 |
Your Statue | 1x1 | Land | Other |
 |
Your Flag | 1x1 | Land | Other |
 |
Outside Lamp | 1x1 | Land | Other |
 |
Guidepost(R) | 1x1 | Land | Other |
 |
Guidepost(L) | 1x1 | Land | Other |
 |
Trash Can | 1x1 | Land | Other |
Safari Zone Areas
Plains | Meadow | Savannah | Peak | Rocky Beach | Wetland | Forest | Swamp | Marshland | Wasteland | Mountain | Desert |
HG/SS
Walking
| HeartGold/SoulSilver | |||||||
| Morning | |||||||
 |  |  |  | ||||
| Rattata | Abra | Girafarig | Smeargle | ||||
  |  | | | ||||
| --% | --% | --% | --% | ||||
| Min Level | Max Level | Min Level | Max Level | Min Level | Max Level | Min Level | Max Level |
| 15 | 17 | 15 | 17 | 15 | 17 | 17 | 17 |
| Day | |||||||
| | | | ||||
| Rattata | Abra | Girafarig | Smeargle | ||||
| | | | | ||||
| --% | --% | --% | --% | ||||
| Min Level | Max Level | Min Level | Max Level | Min Level | Max Level | Min Level | Max Level |
| 15 | 17 | 15 | 17 | 15 | 17 | 17 | 17 |
| Night | |||||||
 | | |  | ||||
| Raticate | Abra | Girafarig | Stantler | ||||
| | | | | ||||
| --% | --% | --% | --% | ||||
| Min Level | Max Level | Min Level | Max Level | Min Level | Max Level | Min Level | Max Level |
| 15 | 17 | 15 | 17 | 15 | 17 | 17 | 17 |
| HeartGold/SoulSilver | |||||||||||||||||||||
| |  |  | |  |  |  |  |  |  | |||||||||||
| Girafarig | Stantler | Manectric | Shinx | Smeargle | Zigzagoon | Ponyta | Houndoom | Zangoose | Lotad | Surskit | |||||||||||
| | |  | | | |  |  | |   |  | |||||||||||
| --% | --% | --% | --% | --% | --% | --% | --% | --% | --% | --% | |||||||||||
| Min Level | Max Level | Min Level | Max Level | Min Level | Max Level | Min Level | Max Level | Min Level | Max Level | Min Level | Max Level | Min Level | Max Level | Min Level | Max Level | Min Level | Max Level | Min Level | Max Level | Min Level | Max Level |
| 40 | 40 | 40 | 40 | 45 | 45 | 43 | 43 | 41 | 41 | 44 | 44 | 42 | 42 | 45 | 45 | 43 | 43 | 42 | 42 | 46 | 46 |
| Objects | Objects | Objects | Objects | Objects | Objects | Objects | Objects | Objects | Objects | Objects | |||||||||||
| 3 Plains Objects | 3 Plains Objects 3 Forest Objects | 15 Plains Objects | 10 Plains Objects | 3 Forest Objects | 15 Forest Objects | 5 Peak Objects | 10 Peak Objects | 15 Peak Objects | 12 Water Objects | 28 Water Objects | |||||||||||
| Days | Days | Days | Days | Days | Days | Days | Days | Days | Days | Days | |||||||||||
| After 0 Days | After 0 Days | After 0 Days | After 0 Days | After 0 Days | After 0 Days | After 0 Days | After 0 Days | After 0 Days | After 0 Days | After 0 Days | |||||||||||
HG/SS
Walking
| HeartGold/SoulSilver | |||||
| Morning | |||||
 |  |  | |||
| Jigglypuff | Hoppip | Skiploom | |||
| |  | | |||
| --% | --% | --% | |||
| Min Level | Max Level | Min Level | Max Level | Min Level | Max Level |
| 15 | 17 | 15 | 17 | 17 | 17 |
| Day | |||||||
|  | | | ||||
| Jigglypuff | Sunkern | Hoppip | Skiploom | ||||
| | | | | ||||
| --% | --% | --% | --% | ||||
| Min Level | Max Level | Min Level | Max Level | Min Level | Max Level | Min Level | Max Level |
| 15 | 17 | 15 | 17 | 16 | 17 | 17 | 17 |
| Night | |||||||
|  |  |  | ||||
| Jigglypuff | Marill | Wooper | Clefairy | ||||
| | |  | | ||||
| --% | --% | --% | --% | ||||
| Min Level | Max Level | Min Level | Max Level | Min Level | Max Level | Min Level | Max Level |
| 15 | 17 | 15 | 17 | 15 | 17 | 17 | 17 |
| HeartGold/SoulSilver | |||||||||||||||||||||
|  | |  |  | | |  | |  |  | |||||||||||
| Raticate | Chansey | Skiploom | Nuzleaf | Geodude | Clefairy | Wooper | Seedot | Nuzleaf | Nosepass | Riolu | |||||||||||
| | | | |  | | | | | |  | |||||||||||
| --% | --% | --% | --% | --% | --% | --% | --% | --% | --% | --% | |||||||||||
| Min Level | Max Level | Min Level | Max Level | Min Level | Max Level | Min Level | Max Level | Min Level | Max Level | Min Level | Max Level | Min Level | Max Level | Min Level | Max Level | Min Level | Max Level | Min Level | Max Level | Min Level | Max Level |
| 40 | 40 | 42 | 42 | 40 | 40 | 38 | 38 | 45 | 45 | 42 | 42 | 40 | 40 | 45 | 45 | 48 | 48 | 45 | 45 | 45 | 45 |
| Objects | Objects | Objects | Objects | Objects | Objects | Objects | Objects | Objects | Objects | Objects | |||||||||||
| 5 Plains Objects | 12 Plains Objects | 8 Forest Objects | 28 Forest Objects | 3 Peak Objects | 3 Peak Objects | 3 Water Objects | 18 Plains Objects | 18 Forest Objects | 18 Peak Objects | 10 Forest Objects 14 Peak Objects | |||||||||||
| Days | Days | Days | Days | Days | Days | Days | Days | Days | Days | Days | |||||||||||
| After 0 Days | After 0 Days | After 0 Days | After 0 Days | After 0 Days | After 0 Days | After 0 Days | After 10 Days | After 20 Days | After 30 Days | After 70 Days | |||||||||||
Surfing
| HeartGold/SoulSilver | |||||
 | | | |||
| Magikarp | Wooper | Marill | |||
| | | | |||
| --% | --% | --% | |||
| Min Level | Max Level | Min Level | Max Level | Min Level | Max Level |
| 15 | 17 | 15 | 17 | 16 | 17 |
| HeartGold/SoulSilver | |||
|  | ||
| Skiploom | Masquerain | ||
| | | ||
| --% | --% | ||
| Min Level | Max Level | Min Level | Max Level |
| 47 | 47 | 42 | 46 |
| Objects | Objects | ||
| 3 Water Objects | 10 Water Objects | ||
| Days | Days | ||
| After 0 Days | After 0 Days | ||
 Old Rod
| HeartGold/SoulSilver | |||
|  | ||
| Magikarp | Poliwag | ||
| | | ||
| --% | --% | ||
| Min Level | Max Level | Min Level | Max Level |
| 15 | 17 | 12 | 15 |
| HeartGold/SoulSilver | |
 | |
| Poliwhirl | |
| | |
| --% | |
| Min Level | Max Level |
| 15 | 16 |
| Objects | |
| 2 Water Objects | |
| Days | |
| After 0 Days | |
 Good Rod
| HeartGold | |||||
| | | |||
| Magikarp | Poliwag | Poliwhirl | |||
| | | | |||
| --% | --% | --% | |||
| Min Level | Max Level | Min Level | Max Level | Min Level | Max Level |
| 22 | 24 | 22 | 24 | 24 | 25 |
| HeartGold/SoulSilver | |||
|  | ||
| Poliwhirl | Gyarados | ||
| | | ||
| --% | --% | ||
| Min Level | Max Level | Min Level | Max Level |
| 27 | 27 | 28 | 28 |
| Objects | Objects | ||
| 5 Water Objects | 7 Water Objects | ||
| Days | Days | ||
| After 0 Days | After 0 Days | ||
 Super Rod
| HeartGold/SoulSilver | |||
| | ||
| Poliwag | Poliwhirl | ||
| | | ||
| --% | --% | ||
| Min Level | Max Level | Min Level | Max Level |
| 35 | 36 | 35 | 38 |
| HeartGold/SoulSilver | |
| |
| Gyarados | |
| | |
| --% | |
| Min Level | Max Level |
| 42 | 45 |
| Objects | |
| 10 Water Objects | |
| Days | |
| After 0 Days | |
HG/SS
Walking
| HeartGold/SoulSilver | |||||||
| Morning | |||||||
 |  |  |  | ||||
| Nidoran (F) | Nidoran (M) | Tauros | Rhyhorn | ||||
 | | | | ||||
| --% | --% | --% | --% | ||||
| Min Level | Max Level | Min Level | Max Level | Min Level | Max Level | Min Level | Max Level |
| 15 | 17 | 15 | 17 | 15 | 17 | 17 | 17 |
| Day | |||||||
| | | | ||||
| Nidoran (F) | Nidoran (M) | Tauros | Rhyhorn | ||||
| | | | | ||||
| --% | --% | --% | --% | ||||
| Min Level | Max Level | Min Level | Max Level | Min Level | Max Level | Min Level | Max Level |
| 15 | 17 | 15 | 17 | 15 | 17 | 17 | 17 |
| Night | |||||||
 |  |  |  | ||||
| Nidorina | Nidorino | Zubat | Golbat | ||||
| | | | | ||||
| --% | --% | --% | --% | ||||
| Min Level | Max Level | Min Level | Max Level | Min Level | Max Level | Min Level | Max Level |
| 15 | 17 | 15 | 17 | 15 | 17 | 17 | 17 |
| HeartGold/SoulSilver | |||||||||||||||||||
| |  |  | |  |  |  |  |  | ||||||||||
| Tauros | Zigzagoon | Luxio | Houndour | Rhyhorn | Rhydon | Azurill | Cacturne | Shroomish | Torkoal | ||||||||||
| | | | | | | | | | | ||||||||||
| --% | --% | --% | --% | --% | --% | --% | --% | --% | --% | ||||||||||
| Min Level | Max Level | Min Level | Max Level | Min Level | Max Level | Min Level | Max Level | Min Level | Max Level | Min Level | Max Level | Min Level | Max Level | Min Level | Max Level | Min Level | Max Level | Min Level | Max Level |
| 41 | 41 | 38 | 38 | 45 | 46 | 42 | 42 | 41 | 41 | 44 | 44 | 42 | 42 | 42 | 42 | 45 | 45 | 46 | 47 |
| Objects | Objects | Objects | Objects | Objects | Objects | Objects | Objects | Objects | Objects | ||||||||||
| 5 Plains Objects | 10 Plains Objects | 24 Plains Objects | 4 Forest Objects | 5 Peak Objects | 10 Peak Objects | 5 Water Objects | 18 Forest Objects | 6 Plains Objects 18 Forest Objects | 18 Peak Objects | ||||||||||
| Days | Days | Days | Days | Days | Days | Days | Days | Days | Days | ||||||||||
| After 0 Days | After 0 Days | After 0 Days | After 0 Days | After 0 Days | After 0 Days | After 0 Days | After 20 Days | After 20 Days | After 30 Days | ||||||||||
HG/SS
Walking
| HeartGold/SoulSilver | |||||||||
| Morning | |||||||||
|  |  |  |  | |||||
| Geodude | Magnemite | Graveler | Magneton | Magmar | |||||
| |  | | | | |||||
| --% | --% | --% | --% | --% | |||||
| Min Level | Max Level | Min Level | Max Level | Min Level | Max Level | Min Level | Max Level | Min Level | Max Level |
| 15 | 17 | 15 | 16 | 16 | 17 | 17 | 17 | 17 | 17 |
| Day | |||||||||
| | | | | |||||
| Geodude | Magnemite | Graveler | Magneton | Magmar | |||||
| | | | | | |||||
| --% | --% | --% | --% | --% | |||||
| Min Level | Max Level | Min Level | Max Level | Min Level | Max Level | Min Level | Max Level | Min Level | Max Level |
| 15 | 17 | 15 | 16 | 16 | 17 | 17 | 17 | 17 | 17 |
| Night | |||||||
| | |  | ||||
| Geodude | Magnemite | Magneton | Wobbuffet | ||||
| | | | | ||||
| --% | --% | --% | --% | ||||
| Min Level | Max Level | Min Level | Max Level | Min Level | Max Level | Min Level | Max Level |
| 15 | 17 | 15 | 16 | 16 | 17 | 16 | 17 |
| HeartGold/SoulSilver | |||||||||||||||||||||
 | |  |  | | |  |  |  |  |  | |||||||||||
| Linoone | Zangoose | Paras | Fearow | Magmar | Wobbuffet | Lairon | Slowbro | Bronzor | Spheal | Vigoroth | |||||||||||
| | | | | | | | | |  | | |||||||||||
| --% | --% | --% | --% | --% | --% | --% | --% | --% | --% | --% | |||||||||||
| Min Level | Max Level | Min Level | Max Level | Min Level | Max Level | Min Level | Max Level | Min Level | Max Level | Min Level | Max Level | Min Level | Max Level | Min Level | Max Level | Min Level | Max Level | Min Level | Max Level | Min Level | Max Level |
| 46 | 46 | 43 | 45 | 42 | 42 | 44 | 44 | 41 | 41 | 41 | 41 | 45 | 45 | 45 | 45 | 45 | 45 | 45 | 45 | 47 | 47 |
| Objects | Objects | Objects | Objects | Objects | Objects | Objects | Objects | Objects | Objects | Objects | |||||||||||
| 5 Plains Objects | 12 Plains Objects | 3 Forest Objects | 5 Forest Objects | 10 Peak Objects | 10 Peak Objects | 24 Peak Objects | 5 Water Objects | 7 Forest Objects 18 Peak Objects | 18 Water Objects | 10 Plains Objects 19 Forest Objects | |||||||||||
| Days | Days | Days | Days | Days | Days | Days | Days | Days | Days | Days | |||||||||||
| After 0 Days | After 0 Days | After 0 Days | After 0 Days | After 0 Days | After 0 Days | After 0 Days | After 0 Days | After 30 Days | After 40 Days | After 60 Days | |||||||||||

HG/SS
Walking
| HeartGold/SoulSilver | |||||||
| Morning | |||||||
 |  |  | | ||||
| Doduo | Slowpoke | Krabby | Slowbro | ||||
| | | | | ||||
| --% | --% | --% | --% | ||||
| Min Level | Max Level | Min Level | Max Level | Min Level | Max Level | Min Level | Max Level |
| 15 | 17 | 15 | 17 | 15 | 17 | 17 | 17 |
| Day | |||||||
| | | | ||||
| Doduo | Slowpoke | Krabby | Slowbro | ||||
| | | | | ||||
| --% | --% | --% | --% | ||||
| Min Level | Max Level | Min Level | Max Level | Min Level | Max Level | Min Level | Max Level |
| 15 | 17 | 15 | 17 | 15 | 17 | 17 | 17 |
| Night | |||||||
| | | | ||||
| Zubat | Slowpoke | Krabby | Slowbro | ||||
| | | | | ||||
| --% | --% | --% | --% | ||||
| Min Level | Max Level | Min Level | Max Level | Min Level | Max Level | Min Level | Max Level |
| 15 | 17 | 15 | 17 | 15 | 17 | 17 | 17 |
| HeartGold/SoulSilver | |||||||||||||||||||
 |  |  | |  | |  |  | |  | ||||||||||
| Dodrio | Electrike | Mareep | Manectric | Budew | Slowbro | Kingler | Aron | Slowbro | Gible | ||||||||||
| | | | | | | | | |  | ||||||||||
| --% | --% | --% | --% | --% | --% | --% | --% | --% | --% | ||||||||||
| Min Level | Max Level | Min Level | Max Level | Min Level | Max Level | Min Level | Max Level | Min Level | Max Level | Min Level | Max Level | Min Level | Max Level | Min Level | Max Level | Min Level | Max Level | Min Level | Max Level |
| 42 | 42 | 42 | 42 | 43 | 43 | 37 | 37 | 40 | 40 | 42 | 42 | 40 | 40 | 44 | 45 | 37 | 37 | 44 | 44 |
| Objects | Objects | Objects | Objects | Objects | Objects | Objects | Objects | Objects | Objects | ||||||||||
| 4 Plains Objects | 10 Plains Objects | 5 Forest Objects | 10 Forest Objects | 18 Forest Objects | 3 Peak Objects | 8 Peak Objects | 24 Peak Objects | 5 Water Objects | 13 Plains Objects 17 Peak Objects | ||||||||||
| Days | Days | Days | Days | Days | Days | Days | Days | Days | Days | ||||||||||
| After 0 Days | After 0 Days | After 0 Days | After 0 Days | After 0 Days | After 0 Days | After 0 Days | After 0 Days | After 0 Days | After 100 Days | ||||||||||
Surfing
| HeartGold/SoulSilver | |||||||
| | |  | ||||
| Magikarp | Poliwag | Poliwhirl | Lapras | ||||
| | | | | ||||
| --% | --% | --% | --% | ||||
| Min Level | Max Level | Min Level | Max Level | Min Level | Max Level | Min Level | Max Level |
| 15 | 16 | 15 | 16 | 16 | 17 | 15 | 16 |
| HeartGold/SoulSilver | |
| |
| Lapras | |
| | |
| --% | |
| Min Level | Max Level |
| 37 | 47 |
| Objects | |
| 10 Water Objects | |
| Days | |
| After 0 Days | |
Old Rod
| HeartGold/SoulSilver | |||||
|  | | |||
| Magikarp | Goldeen | Krabby | |||
| | | | |||
| --% | --% | --% | |||
| Min Level | Max Level | Min Level | Max Level | Min Level | Max Level |
| 12 | 14 | 13 | 15 | 13 | 15 |
| HeartGold/SoulSilver | |
| |
| Krabby | |
| | |
| --% | |
| Min Level | Max Level |
| 17 | 18 |
| Objects | |
| 2 Water Objects | |
| Days | |
| After 0 Days | |
Good Rod
| HeartGold | |||||
| | | |||
| Magikarp | Goldeen | Krabby | |||
| | | | |||
| --% | --% | --% | |||
| Min Level | Max Level | Min Level | Max Level | Min Level | Max Level |
| 22 | 23 | 22 | 23 | 22 | 25 |
| HeartGold/SoulSilver | |
| |
| Kingler | |
| | |
| --% | |
| Min Level | Max Level |
| 26 | 27 |
| Objects | |
| 3 Water Objects | |
| Days | |
| After 0 Days | |
Super Rod
| HeartGold/SoulSilver | |||||
|  | | |||
| Goldeen | Seaking | Kingler | |||
| | | | |||
| --% | --% | --% | |||
| Min Level | Max Level | Min Level | Max Level | Min Level | Max Level |
| 35 | 38 | 35 | 38 | 38 | 39 |
| HeartGold/SoulSilver | |
 | |
| Corphish | |
| | |
| --% | |
| Min Level | Max Level |
| 46 | 48 |
| Objects | |
| 15 Water Objects | |
| Days | |
| After 0 Days | |

HG/SS
Walking
| HeartGold/SoulSilver | |||||||
| Morning | |||||||
 |  |  |  | ||||
| Spearow | Sentret | Farfetch'd | Ditto | ||||
| | | | | ||||
| --% | --% | --% | --% | ||||
| Min Level | Max Level | Min Level | Max Level | Min Level | Max Level | Min Level | Max Level |
| 15 | 17 | 15 | 17 | 15 | 17 | 17 | 17 |
| Day | |||||||
| | | | ||||
| Spearow | Sentret | Farfetch'd | Ditto | ||||
| | | | | ||||
| --% | --% | --% | --% | ||||
| Min Level | Max Level | Min Level | Max Level | Min Level | Max Level | Min Level | Max Level |
| 15 | 17 | 15 | 17 | 15 | 17 | 17 | 17 |
| Night | |||||||
|  |  |  | ||||
| Wooper | Psyduck | Quagsire | Golduck | ||||
| | | | | ||||
| --% | --% | --% | --% | ||||
| Min Level | Max Level | Min Level | Max Level | Min Level | Max Level | Min Level | Max Level |
| 15 | 17 | 15 | 16 | 16 | 17 | 17 | 17 |
| HeartGold/SoulSilver | |||||||||||||||||||
 | |  | |  | | | |  |  | ||||||||||
| Furret | Surskit | Lombre | Farfetch'd | Pachirisu | Doduo | Golduck | Ditto | Buizel | Shelgon | ||||||||||
| | | | | | | | | | | ||||||||||
| --% | --% | --% | --% | --% | --% | --% | --% | --% | --% | ||||||||||
| Min Level | Max Level | Min Level | Max Level | Min Level | Max Level | Min Level | Max Level | Min Level | Max Level | Min Level | Max Level | Min Level | Max Level | Min Level | Max Level | Min Level | Max Level | Min Level | Max Level |
| 37 | 37 | 40 | 40 | 47 | 47 | 41 | 41 | 43 | 43 | 45 | 45 | 40 | 40 | 41 | 41 | 45 | 45 | 46 | 46 |
| Objects | Objects | Objects | Objects | Objects | Objects | Objects | Objects | Objects | Objects | ||||||||||
| 2 Plains Objects | 6 Plains Objects | 14 Plains Objects | 3 Forest Objects | 8 Forest Objects | 4 Peak Objects | 5 Peak Objects | 15 Water Objects | 18 Water Objects | 21 Peak Objects | ||||||||||
| Days | Days | Days | Days | Days | Days | Days | Days | Days | Days | ||||||||||
| After 0 Days | After 0 Days | After 0 Days | After 0 Days | After 0 Days | After 0 Days | After 0 Days | After 0 Days | After 40 Days | After 70 Days | ||||||||||
Surfing
| HeartGold/SoulSilver | |||||||
| | | | ||||
| Poliwag | Wooper | Psyduck | Quagsire | ||||
| | | | | ||||
| --% | --% | --% | --% | ||||
| Min Level | Max Level | Min Level | Max Level | Min Level | Max Level | Min Level | Max Level |
| 15 | 16 | 15 | 16 | 16 | 17 | 16 | 17 |
| HeartGold/SoulSilver | |||
| | ||
| Quagsire | Golduck | ||
| | | ||
| --% | --% | ||
| Min Level | Max Level | Min Level | Max Level |
| 37 | 37 | 37 | 45 |
| Objects | Objects | ||
| 3 Water Objects | 4 Water Objects | ||
| Days | Days | ||
| After 0 Days | After 0 Days | ||
Old Rod
| HeartGold/SoulSilver | |||
| | ||
| Magikarp | Poliwag | ||
| | | ||
| --% | --% | ||
| Min Level | Max Level | Min Level | Max Level |
| 12 | 14 | 12 | 15 |
| HeartGold/SoulSilver | |
| |
| Poliwhirl | |
| | |
| --% | |
| Min Level | Max Level |
| 17 | 18 |
| Objects | |
| 2 Water Objects | |
| Days | |
| After 0 Days | |
Good Rod
| HeartGold | |||
| | ||
| Poliwag | Poliwhirl | ||
| | | ||
| --% | --% | ||
| Min Level | Max Level | Min Level | Max Level |
| 22 | 24 | 23 | 25 |
| HeartGold/SoulSilver | |
| |
| Corphish | |
| | |
| --% | |
| Min Level | Max Level |
| 26 | 28 |
| Objects | |
| 10 Water Objects | |
| Days | |
| After 0 Days | |
Super Rod
| HeartGold/SoulSilver | |||
| | ||
| Poliwag | Poliwhirl | ||
| | | ||
| --% | --% | ||
| Min Level | Max Level | Min Level | Max Level |
| 35 | 37 | 35 | 37 |
| HeartGold/SoulSilver | |
| |
| Gyarados | |
| | |
| --% | |
| Min Level | Max Level |
| 45 | 48 |
| Objects | |
| 6 Water Objects | |
| Days | |
| After 0 Days | |

HG/SS
Walking
| HeartGold/SoulSilver | |||||||
| Morning | |||||||
 |  |  |  | ||||
| Bellsprout | Pidgey | Mr. Mime | Misdreavus | ||||
| | | |  | ||||
| --% | --% | --% | --% | ||||
| Min Level | Max Level | Min Level | Max Level | Min Level | Max Level | Min Level | Max Level |
| 15 | 17 | 15 | 17 | 15 | 17 | 17 | 17 |
| Day | |||||||
| | | | ||||
| Bellsprout | Pidgey | Mr. Mime | Misdreavus | ||||
| | | | | ||||
| --% | --% | --% | --% | ||||
| Min Level | Max Level | Min Level | Max Level | Min Level | Max Level | Min Level | Max Level |
| 15 | 17 | 15 | 17 | 15 | 17 | 17 | 17 |
| Night | |||||||
|  | |  | ||||
| Bellsprout | Gastly | Misdreavus | Haunter | ||||
| | | | | ||||
| --% | --% | --% | --% | ||||
| Min Level | Max Level | Min Level | Max Level | Min Level | Max Level | Min Level | Max Level |
| 15 | 17 | 15 | 17 | 15 | 17 | 17 | 17 |
| HeartGold/SoulSilver | |||||||||||||||||||
| | |  |  |  | |  |  |  | ||||||||||
| Mr. Mime | Budew | Misdreavus | Electabuzz | Lickitung | Bidoof | Surskit | Shuppet | Beldum | Bronzong | ||||||||||
| | | | | | | | | | | ||||||||||
| --% | --% | --% | --% | --% | --% | --% | --% | --% | --% | ||||||||||
| Min Level | Max Level | Min Level | Max Level | Min Level | Max Level | Min Level | Max Level | Min Level | Max Level | Min Level | Max Level | Min Level | Max Level | Min Level | Max Level | Min Level | Max Level | Min Level | Max Level |
| 45 | 45 | 47 | 47 | 42 | 42 | 41 | 41 | 40 | 40 | 40 | 40 | 42 | 42 | 46 | 46 | 44 | 44 | 45 | 45 |
| Objects | Objects | Objects | Objects | Objects | Objects | Objects | Objects | Objects | Objects | ||||||||||
| 3 Plains Objects | 24 Plains Objects | 4 Forest Objects | 4 Peak Objects | 3 Water Objects | 10 Water Objects | 24 Water Objects | 18 Forest Objects | 21 Peak Objects | 9 Forest Objects 19 Peak Objects | ||||||||||
| Days | Days | Days | Days | Days | Days | Days | Days | Days | Days | ||||||||||
| After 0 Days | After 0 Days | After 0 Days | After 0 Days | After 0 Days | After 0 Days | After 0 Days | After 20 Days | After 70 Days | After 110 Days | ||||||||||
HG/SS
Walking
| HeartGold/SoulSilver | |||||||
| Morning | |||||||
| | |  | ||||
| Sentret | Jigglypuff | Paras | Murkrow | ||||
| | | | | ||||
| --% | --% | --% | --% | ||||
| Min Level | Max Level | Min Level | Max Level | Min Level | Max Level | Min Level | Max Level |
| 15 | 17 | 15 | 17 | 15 | 17 | 17 | 17 |
| Day | |||||||
| | | | ||||
| Sentret | Jigglypuff | Paras | Murkrow | ||||
| | | | | ||||
| --% | --% | --% | --% | ||||
| Min Level | Max Level | Min Level | Max Level | Min Level | Max Level | Min Level | Max Level |
| 15 | 17 | 15 | 17 | 15 | 17 | 17 | 17 |
| Night | |||||||
|  | |  | ||||
| Sentret | Drowzee | Murkrow | Hypno | ||||
| | | | | ||||
| --% | --% | --% | --% | ||||
| Min Level | Max Level | Min Level | Max Level | Min Level | Max Level | Min Level | Max Level |
| 15 | 17 | 15 | 17 | 15 | 17 | 17 | 17 |
| HeartGold/SoulSilver | |||||||||||||||||||||
 | | | | |  |  |  |  |  |  | |||||||||||
| Parasect | Furret | Pachirisu | Krabby | Hypno | Weepinbell | Chimecho | Voltorb | Duskull | Floatzel | Bagon | |||||||||||
| | | | | | | | | | | | |||||||||||
| --% | --% | --% | --% | --% | --% | --% | --% | --% | --% | --% | |||||||||||
| Min Level | Max Level | Min Level | Max Level | Min Level | Max Level | Min Level | Max Level | Min Level | Max Level | Min Level | Max Level | Min Level | Max Level | Min Level | Max Level | Min Level | Max Level | Min Level | Max Level | Min Level | Max Level |
| 41 | 41 | 42 | 42 | 47 | 47 | 37 | 37 | 37 | 37 | 46 | 46 | 47 | 47 | 42 | 42 | 38 | 38 | 44 | 44 | 45 | 45 |
| Objects | Objects | Objects | Objects | Objects | Objects | Objects | Objects | Objects | Objects | Objects | |||||||||||
| 3 Plains Objects | 5 Plains Objects | 10 Plains Objects | 5 Forest Objects | 5 Forest Objects | 8 Forest Objects | 15 Forest Objects | 10 Peak Objects | 28 Peak Objects | 10 Water Objects | 9 Forest Objects 19 Peak Objects | |||||||||||
| Days | Days | Days | Days | Days | Days | Days | Days | Days | Days | Days | |||||||||||
| After 0 Days | After 0 Days | After 0 Days | After 0 Days | After 0 Days | After 0 Days | After 0 Days | After 0 Days | After 0 Days | After 0 Days | After 110 Days | |||||||||||
Surfing
| HeartGold/SoulSilver | |||
| | ||
| Magikarp | Goldeen | ||
| | | ||
| --% | --% | ||
| Min Level | Max Level | Min Level | Max Level |
| 15 | 17 | 15 | 17 |
| HeartGold/SoulSilver | |||||
| | | |||
| Seaking | Murkrow | Duskull | |||
| | | | |||
| --% | --% | --% | |||
| Min Level | Max Level | Min Level | Max Level | Min Level | Max Level |
| 42 | 42 | 47 | 47 | 48 | 48 |
| Objects | Objects | Objects | |||
| 4 Water Objects | 10 Water Objects | 18 Water Objects | |||
| Days | Days | Days | |||
| After 0 Days | After 0 Days | After 40 Days | |||
Old Rod
| HeartGold/SoulSilver | |
| |
| Magikarp | |
| | |
| --% | |
| Min Level | Max Level |
| 12 | 15 |
| HeartGold/SoulSilver | |||
| | ||
| Goldeen | Seaking | ||
| | | ||
| --% | --% | ||
| Min Level | Max Level | Min Level | Max Level |
| 17 | 17 | 17 | 17 |
| Objects | Objects | ||
| 4 Water Objects | 10 Water Objects | ||
| Days | Days | ||
| After 0 Days | After 0 Days | ||
Good Rod
| HeartGold | |||||
| | | |||
| Magikarp | Goldeen | Seaking | |||
| | | | |||
| --% | --% | --% | |||
| Min Level | Max Level | Min Level | Max Level | Min Level | Max Level |
| 22 | 24 | 22 | 24 | 24 | 25 |
| HeartGold/SoulSilver | |||
|  | ||
| Seaking | Dratini | ||
| | | ||
| --% | --% | ||
| Min Level | Max Level | Min Level | Max Level |
| 27 | 27 | 29 | 29 |
| Objects | Objects | ||
| 6 Water Objects | 10 Water Objects | ||
| Days | Days | ||
| After 0 Days | After 0 Days | ||
Super Rod
| HeartGold/SoulSilver | |||||
| | | |||
| Goldeen | Seaking | Dratini | |||
| | | | |||
| --% | --% | --% | |||
| Min Level | Max Level | Min Level | Max Level | Min Level | Max Level |
| 35 | 37 | 35 | 37 | 36 | 37 |
| HeartGold/SoulSilver | |
 | |
| Dragonair | |
| | |
| --% | |
| Min Level | Max Level |
| 42 | 45 |
| Objects | |
| 20 Water Objects | |
| Days | |
| After 0 Days | |
HG/SS
Walking
| HeartGold/SoulSilver | |||||||||
| Morning | |||||||||
 |  |  |  |  | |||||
| Ekans | Koffing | Weezing | Arbok | Grimer | |||||
| | | | | | |||||
| --% | --% | --% | --% | --% | |||||
| Min Level | Max Level | Min Level | Max Level | Min Level | Max Level | Min Level | Max Level | Min Level | Max Level |
| 15 | 17 | 15 | 17 | 15 | 17 | 17 | 17 | 17 | 17 |
| Day | |||||||||
| | | | | |||||
| Ekans | Koffing | Weezing | Arbok | Grimer | |||||
| | | | | | |||||
| --% | --% | --% | --% | --% | |||||
| Min Level | Max Level | Min Level | Max Level | Min Level | Max Level | Min Level | Max Level | Min Level | Max Level |
| 15 | 17 | 15 | 17 | 15 | 17 | 17 | 17 | 17 | 17 |
| Night | |||||||
| |  |  | ||||
| Wooper | Koffing | Oddish | Gloom | ||||
| | | | | ||||
| --% | --% | --% | --% | ||||
| Min Level | Max Level | Min Level | Max Level | Min Level | Max Level | Min Level | Max Level |
| 15 | 17 | 15 | 17 | 15 | 17 | 17 | 17 |
| HeartGold/SoulSilver | |||||||||||||||||||
|  |  |  |  |  |  |  |  |  | ||||||||||
| Gloom | Jumpluff | Diglett | Shuckle | Muk | Seviper | Carnivine | Croagunk | Roselia | Banette | ||||||||||
| | | | | | | | | | | ||||||||||
| --% | --% | --% | --% | --% | --% | --% | --% | --% | --% | ||||||||||
| Min Level | Max Level | Min Level | Max Level | Min Level | Max Level | Min Level | Max Level | Min Level | Max Level | Min Level | Max Level | Min Level | Max Level | Min Level | Max Level | Min Level | Max Level | Min Level | Max Level |
| 42 | 42 | 38 | 38 | 43 | 43 | 44 | 44 | 38 | 38 | 47 | 48 | 41 | 41 | 44 | 44 | 46 | 46 | 44 | 44 |
| Objects | Objects | Objects | Objects | Objects | Objects | Objects | Objects | Objects | Objects | ||||||||||
| 2 Plains Objects | 5 Plains Objects | 5 Peak Objects | 8 Peak Objects | 8 Water Objects | 18 Plains Objects | 18 Forest Objects | 21 Forest Objects | 25 Forest Objects | 25 Peak Objects | ||||||||||
| Days | Days | Days | Days | Days | Days | Days | Days | Days | Days | ||||||||||
| After 0 Days | After 0 Days | After 0 Days | After 0 Days | After 0 Days | After 10 Days | After 20 Days | After 20 Days | After 20 Days | After 30 Days | ||||||||||
Surfing
| HeartGold/SoulSilver | |||||
| | | |||
| Poliwag | Wooper | Grimer | |||
| | | | |||
| --% | --% | --% | |||
| Min Level | Max Level | Min Level | Max Level | Min Level | Max Level |
| 15 | 17 | 15 | 17 | 15 | 17 |
| HeartGold/SoulSilver | |||||
| | | |||
| Jumpluff | Quagsire | Muk | |||
| | | | |||
| --% | --% | --% | |||
| Min Level | Max Level | Min Level | Max Level | Min Level | Max Level |
| 47 | 47 | 43 | 43 | 48 | 48 |
| Objects | Objects | Objects | |||
| 10 Water Objects | 13 Water Objects | 16 Water Objects | |||
| Days | Days | Days | |||
| After 0 Days | After 0 Days | After 0 Days | |||
Old Rod
| HeartGold/SoulSilver | |||
| | ||
| Magikarp | Poliwag | ||
| | | ||
| --% | --% | ||
| Min Level | Max Level | Min Level | Max Level |
| 12 | 15 | 12 | 15 |
| HeartGold/SoulSilver | |
| |
| Poliwag | |
| | |
| --% | |
| Min Level | Max Level |
| 16 | 18 |
| Objects | |
| 2 Water Objects | |
| Days | |
| After 0 Days | |
Good Rod
| HeartGold | |||
| | ||
| Magikarp | Poliwhirl | ||
| | | ||
| --% | --% | ||
| Min Level | Max Level | Min Level | Max Level |
| 22 | 24 | 22 | 25 |
| HeartGold/SoulSilver | |
| |
| Gyarados | |
| | |
| --% | |
| Min Level | Max Level |
| 26 | 29 |
| Objects | |
| 3 Water Objects | |
| Days | |
| After 0 Days | |
Super Rod
| HeartGold/SoulSilver | |||
| | ||
| Poliwhirl | Gyarados | ||
| | | ||
| --% | --% | ||
| Min Level | Max Level | Min Level | Max Level |
| 35 | 38 | 36 | 37 |
| HeartGold/SoulSilver | |
 | |
| Barboach | |
| | |
| --% | |
| Min Level | Max Level |
| 42 | 45 |
| Objects | |
| 4 Water Objects | |
| Days | |
| After 0 Days | |

HG/SS
Walking
| HeartGold/SoulSilver | |||||||||
| Morning | |||||||||
 | |  |  |  | |||||
| Kangaskhan | Magnemite | Onix | Machop | Machoke | |||||
| | | | | | |||||
| --% | --% | --% | --% | --% | |||||
| Min Level | Max Level | Min Level | Max Level | Min Level | Max Level | Min Level | Max Level | Min Level | Max Level |
| 15 | 17 | 15 | 17 | 15 | 16 | 16 | 17 | 17 | 17 |
| Day | |||||||||
| | | | | |||||
| Kangaskhan | Magnemite | Onix | Machop | Machoke | |||||
| | | | | | |||||
| --% | --% | --% | --% | --% | |||||
| Min Level | Max Level | Min Level | Max Level | Min Level | Max Level | Min Level | Max Level | Min Level | Max Level |
| 15 | 17 | 15 | 17 | 15 | 16 | 16 | 17 | 17 | 17 |
| Night | |||||
| | | |||
| Fearow | Magnemite | Onix | |||
| | | | |||
| --% | --% | --% | |||
| Min Level | Max Level | Min Level | Max Level | Min Level | Max Level |
| 15 | 17 | 15 | 16 | 15 | 17 |
| HeartGold/SoulSilver | |||||||||||||||||||
|  | | |  | | |  |  |  | ||||||||||
| Manectric | Illumise | Bellsprout | Machoke | Skorupi | Golduck | Kingler | Medicham | Breloom | Solrock | ||||||||||
| | | | | | | | | | | ||||||||||
| --% | --% | --% | --% | --% | --% | --% | --% | --% | --% | ||||||||||
| Min Level | Max Level | Min Level | Max Level | Min Level | Max Level | Min Level | Max Level | Min Level | Max Level | Min Level | Max Level | Min Level | Max Level | Min Level | Max Level | Min Level | Max Level | Min Level | Max Level |
| 41 | 41 | 46 | 46 | 41 | 41 | 40 | 40 | 44 | 45 | 45 | 45 | 48 | 48 | 44 | 44 | 46 | 46 | 45 | 46 |
| Objects | Objects | Objects | Objects | Objects | Objects | Objects | Objects | Objects | Objects | ||||||||||
| 3 Plains Objects | 10 Plains Objects | 3 Forest Objects | 5 Peak Objects | 28 Peak Objects | 3 Water Objects | 10 Water Objects | 18 Forest Objects | 21 Forest Objects | 21 Peak Objects | ||||||||||
| Days | Days | Days | Days | Days | Days | Days | Days | Days | Days | ||||||||||
| After 0 Days | After 0 Days | After 0 Days | After 0 Days | After 0 Days | After 0 Days | After 0 Days | After 20 Days | After 20 Days | After 30 Days | ||||||||||

HG/SS
Walking
| HeartGold/SoulSilver | |||||||||
| Morning | |||||||||
| | | |  | |||||
| Rattata | Raticate | Lickitung | Magneton | Larvitar | |||||
| | | | | | |||||
| --% | --% | --% | --% | --% | |||||
| Min Level | Max Level | Min Level | Max Level | Min Level | Max Level | Min Level | Max Level | Min Level | Max Level |
| 15 | 16 | 15 | 17 | 15 | 17 | 17 | 17 | 17 | 17 |
| Day | |||||||||
| | | | | |||||
| Rattata | Raticate | Lickitung | Magneton | Larvitar | |||||
| | | | | | |||||
| --% | --% | --% | --% | --% | |||||
| Min Level | Max Level | Min Level | Max Level | Min Level | Max Level | Min Level | Max Level | Min Level | Max Level |
| 15 | 16 | 15 | 17 | 15 | 17 | 17 | 17 | 17 | 17 |
| Night | |||||||
| | | | ||||
| Zubat | Golbat | Rattata | Magneton | ||||
| | | | | ||||
| --% | --% | --% | --% | ||||
| Min Level | Max Level | Min Level | Max Level | Min Level | Max Level | Min Level | Max Level |
| 15 | 17 | 15 | 17 | 15 | 16 | 17 | 17 |
| HeartGold/SoulSilver | |||||||||||||||||||
|  |  |  | |  | |  |  |  | ||||||||||
| Magneton | Volbeat | Chingling | Meditite | Larvitar | Lunatone | Krabby | Dusclops | Metang | Sealeo | ||||||||||
| | | | | | | | | | | ||||||||||
| --% | --% | --% | --% | --% | --% | --% | --% | --% | --% | ||||||||||
| Min Level | Max Level | Min Level | Max Level | Min Level | Max Level | Min Level | Max Level | Min Level | Max Level | Min Level | Max Level | Min Level | Max Level | Min Level | Max Level | Min Level | Max Level | Min Level | Max Level |
| 42 | 42 | 46 | 46 | 38 | 38 | 44 | 44 | 42 | 42 | 46 | 46 | 43 | 43 | 45 | 45 | 44 | 44 | 45 | 45 |
| Objects | Objects | Objects | Objects | Objects | Objects | Objects | Objects | Objects | Objects | ||||||||||
| 3 Plains Objects | 10 Plains Objects | 10 Forest Objects | 20 Forest Objects | 5 Peak Objects | 15 Peak Objects | 3 Water Objects | 18 Forest Objects | 28 Peak Objects | 7 Peak Objects 17 Water Objects | ||||||||||
| Days | Days | Days | Days | Days | Days | Days | Days | Days | Days | ||||||||||
| After 0 Days | After 0 Days | After 0 Days | After 0 Days | After 0 Days | After 0 Days | After 0 Days | After 20 Days | After 30 Days | After 80 Days | ||||||||||

HG/SS
Walking
| HeartGold/SoulSilver | |||||||
| Morning | |||||||
 |  |  |  | ||||
| Sandshrew | Sandslash | Cubone | Marowak | ||||
| | | | | ||||
| --% | --% | --% | --% | ||||
| Min Level | Max Level | Min Level | Max Level | Min Level | Max Level | Min Level | Max Level |
| 15 | 17 | 15 | 17 | 15 | 16 | 17 | 17 |
| Day | |||||||
| | | | ||||
| Sandshrew | Sandslash | Cubone | Marowak | ||||
| | | | | ||||
| --% | --% | --% | --% | ||||
| Min Level | Max Level | Min Level | Max Level | Min Level | Max Level | Min Level | Max Level |
| 15 | 17 | 15 | 17 | 15 | 16 | 17 | 17 |
| Night | |||||
| | | |||
| Sandshrew | Sandslash | Fearow | |||
| | | | |||
| --% | --% | --% | |||
| Min Level | Max Level | Min Level | Max Level | Min Level | Max Level |
| 15 | 17 | 15 | 17 | 15 | 17 |
| HeartGold/SoulSilver | |||||||||||||||||||||
|  | | |  | | |  |  |  | | |||||||||||
| Fearow | Spinda | Marowak | Fearow | Hippopotas | Lotad | Carnivine | Cacnea | Vibrava | Trapinch | Cacturne | |||||||||||
| | | | | | | | | | | | |||||||||||
| --% | --% | --% | --% | --% | --% | --% | --% | --% | --% | --% | |||||||||||
| Min Level | Max Level | Min Level | Max Level | Min Level | Max Level | Min Level | Max Level | Min Level | Max Level | Min Level | Max Level | Min Level | Max Level | Min Level | Max Level | Min Level | Max Level | Min Level | Max Level | Min Level | Max Level |
| 38 | 38 | 45 | 45 | 41 | 41 | 41 | 41 | 43 | 43 | 38 | 38 | 48 | 48 | 35 | 35 | 44 | 44 | 46 | 47 | 48 | 48 |
| Objects | Objects | Objects | Objects | Objects | Objects | Objects | Objects | Objects | Objects | Objects | |||||||||||
| 3 Plains Objects | 14 Plains Objects | 6 Peak Objects | 6 Peak Objects | 28 Peak Objects | 8 Water Objects | 25 Plains Objects | 18 Forest Objects | 25 Forest Objects | 25 Peak Objects | 21 Water Objects | |||||||||||
| Days | Days | Days | Days | Days | Days | Days | Days | Days | Days | Days | |||||||||||
| After 0 Days | After 0 Days | After 0 Days | After 0 Days | After 0 Days | After 0 Days | After 10 Days | After 20 Days | After 20 Days | After 30 Days | After 40 Days | |||||||||||