Rather than having Gyms in the Alola Region, when children become 11 years old, then they have the ability to go through the region and participate in special Island Trials. These trials are led by Trial Captains, who you don't battle at the time, who give specific tasks and then typically end with a battle against Totem Pokémon, which are larger variants of the Pokémon that have their stats boosted by an aura. There are 7 trials across the Alola Region
| Trial #1: Normalium Z |
Trial Captain: Ilmia
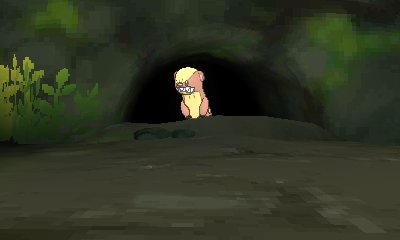
Location: Verdant Cavern - Melemele Island
Details:
The first trial is set by Ilima. When you enter Verdant Cavern, you are sent to find the three Pokémon that are in the cave. These Pokémon are Yungoos (Sun) or Rattata (Moon). When found, they will attack you, at Level 11, and cannot be captured. Half way through the trial, Team Skull appear to mess things up. The third Pokémon is a Gumshoos or Raticate depending on your version, also Level 11.
When defeated, you're allowed out of the Trial Site towards the Totem's Den where the Normalium Z can be found.
|
 |
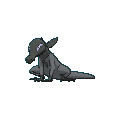
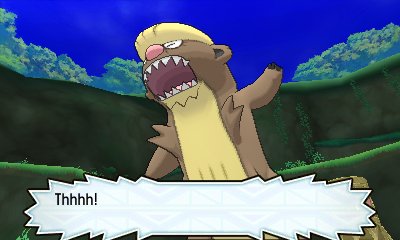
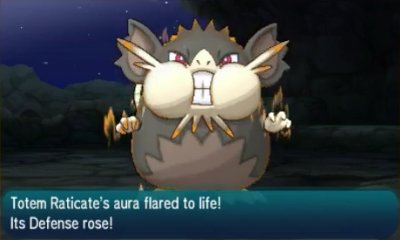
| Totem #1: Gumshoos/Raticate |
Trial Captain: Ilmia
Location: Verdant Cavern - Melemele Island
Details:
The Totem Pokémon actually varies depending on version. If you are playing Pokémon Sun, it will be Gumshoos and if you are playing Pokémon moon, it will be Raticate. The Totem Pokémon's Defense stat is raised by 1 stage. Defeat them to obtain the Normalium Z and end the trial
|
 |
| Trial #2: Waterium Z |
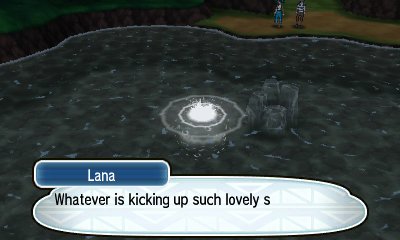
Trial Captain: Lana
Location: Brooklet Hill - Akala Island
Details:
The first trial is set by Lana. When you arrive in Brooklet Hill, she will note about some strange happenings in the area and asks you to help investigate. As you travel down through the hill, you will have to battle multiple Wishiwashi before you reach the bottom where the true Trial begins, the battle of the Totem Pokémon.
|
 |
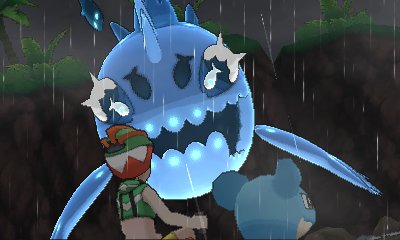
| Totem #2: Wishiwashi |
Trial Captain: Lana
Location: Brooklet Hill - Akala Island
Details:
Reach the bottom and it will start to rain and it's your task to investigate the Pokémon causing the issues in Brooklet Hill. The Totem Pokémon is Wishiwashi and is automatically in its School Form. The Totem Pokémon's Defense stat is raised by 1 stage. Defeat them to obtain the Waterium Z and end the trial
|
 |
| Trial #3: Firium Z |
Trial Captain: Kiawe
Location: Wela Volcano Park - Akala Island
Details:
The next trial is set by Kiawe. This trial has you look at two dances by Alolan Marowak and you have to tell the difference between the two. If you fail, Marowak will battle you and you have to try again. If you succeed, Marowak will battle you and you progress. It then adds a Hiker to the mix before the final challenge of the Totem Pokémon.
|
 |
| Totem #3: Salazzle |
Trial Captain: Kiawe
Location: Wela Volcano Park - Akala Island
Details:
Get the final dance correct, which isn't hard, and the Totem Pokémon, Salazzle, will challenge you. Its Special Defense gets boosted when the battle commences.
|
 |
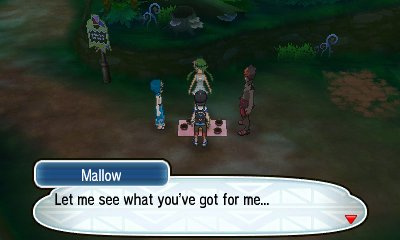
| Trial #4: Grassium Z |
Trial Captain: Mallow
Location: Lush Jungle - Akala Island
Details:
The next trial is set by Mallow in the Lush Jungle. She will give you a Forage Bag and request you find a Mago Berry, a Tiny Mushroom, a Revival Herb and a Miracle Seed, all of which can be found in the Lush Jungle. As you go through, you'll be attacked by a Parasect Lv. 22, Fomantis Lv. 22 and Formantis Lv. 23 right after you get the Tiny Mushroom, Mago Berry and Revival Herb respectively. Collect all the ingredients and Kiawe & Lana will appear and a meal is cooked.
|
 |
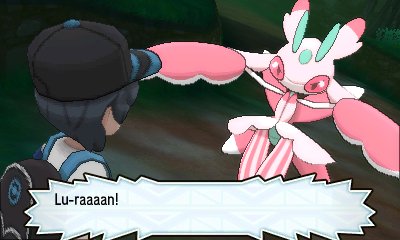
| Totem #4: Lurantis |
Location: Lush Jungle - Akala Island
Location: Wela Volcano Park - Akala Island
Details:
As the meal is cooked, it will attract the attention of the Totem Pokémon, Lurantis, which will sneak up on you and attack. It has its Speed boosted as the battle starts and its partner, Castform, uses Sunny weather to give Lurantis an advantage.
|
 |
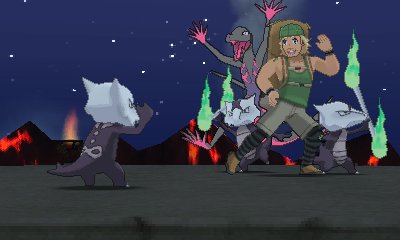
| Trial #5: Electirium Z |
Trial Captain: Sophocles
Location: Hokulani Observatory - Ula'ula Island
Details:
When you reach Hokulani Observatory, you'll be challenged by the former Trial Captain, Molyane, to show that you are ready for the fifth trial. When you defeat him and go inside, you will meet Sophocles who has created a system to bring the totem Pokémon to you but doing so causes a power cut which can be fixed by answering three audio questions. When you answer them correctly, a Level 27 Grubbin and two Level 27 Charjabugs appear to battle..
|
 |
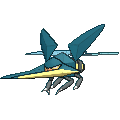
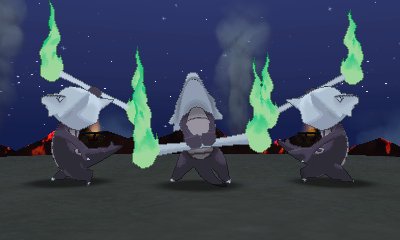
| Totem #5: Vikavolt |
Trial Captain: Sophocles
Location: Hokulani Observatory - Ula'ula Island
Details:
Successfully answer the questions and you'll see the Totem Pokémon gradually make its way up to the mountain and, when the final question is answered, it appears. All of its stats are boosted at the start of battle. Its SOS partner is Charjabug, whose Battery ability causes Vikavolt to be even more damaging
|
 |
| Trial #6: Ghostium Z |
Trial Captain: Acerola
Location: Route 14 - Ula'ula Island
Details:
As you travel through Ula'ula Island, you will meet Acerola who, eventually, confirms that she is the next Trial Captain. She will explain that the next trial takes place in the Abandoned Thrifty Megamart in Route 14 and involves you explorinjg the abandoned store and looking for ghostly happenings. As you do so, you battle a Gastly, Haunter and Gengar, all Level 30.
|
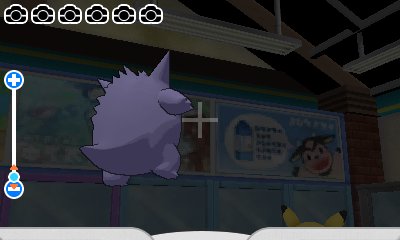 |
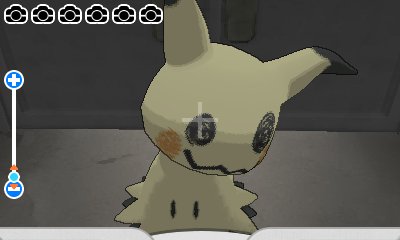
| Totem #6: Mimikyu |
Trial Captain: Acerola
Location: Route 14 - Ula'ula Island
Details:
Eventually, you'll follow the ghost of a Pikachu into the back room of the store, which is adorned with pictures of Pikachu. Take out your PokéFinder and you'll battle the Totem Pokémon, a Mimikyu.All its stats are increased for the battle. Afterwards, Acerola informs you that there is no back room to the mart
|
 |
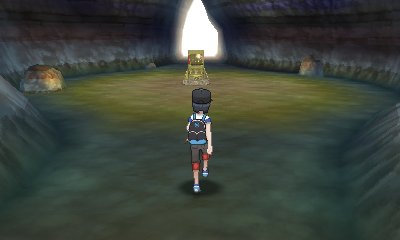
| Trial #7: Dragonium Z |
Trial Captain: None
Location: Vast Poni Canyon - Poni Island
Details:
The last trial happens after you meet the final Trial Captain, Mina, but has nothing to do with her as she hasn't created a trial yet. Instead, in Vast Poni Canyon, you will find the original trial site where trials began long ago. This trial is simply to get through the path to get the Dragonium Z, but as you do you get attacked by a Jangmo-o (Level 40), then by a Hakamo-o (Level 40).
|
 |
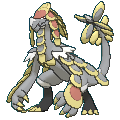
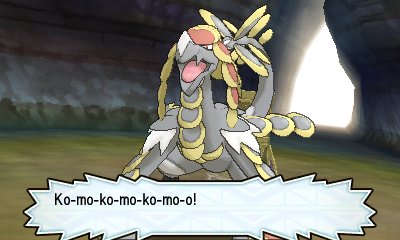
| Totem #7: Kommo-o |
Trial Captain: None
Location: Vast Poni Canyon - Poni Island
Details:
Reach the end, and before you can collect the Dragonium Z, the Totem Pokémon jumps into the cavern and attacks you. All its stats are increased
|
 |